Raw editing using Pixelmator Pro and Photomator: Anyone else?

Tachikaze

Active Member
Site Supporter
Site Supporter
Followers
0
Following
0
Joined
Dec 14, 2023
Posts
44
Likes Received
36
Name
David MacNeill
Country
United States
City/State
Boise ID
CC Welcome
  1. No
I know how to do basic photo editing, but I want to go deep on raw photo editing using Pixelmator Pro and Photomator on my Mac — and I don’t know where to begin! I need some kind of basic”first steps” guide to raw editing in general. Surely there must be mostly commonalities in the basic functions between Lightroom and all the other similar apps on all platforms.

Example: If I understood the basics of what JPEG processing consists of, I would be able to mimic those steps but without the loss of resolution.

Example: What are the first five things you do when you open a raw photo into your editor of choice?

Your thoughts and suggestions, please?
 
Never heard of either one. Download Darktable and I could help. Totally free and every bit as powerful as Adobe.
 
Never heard of either one. Download Darktable and I could help. Totally free and every bit as powerful as Adobe.
I’ll check it out since they have a Mac build and I am a cut-me-and-I-bleed-six-colors Apple man since 1984.
 
I haven't heard of either product. I use mostly PhotoShop, some DXO PhotoLab, and occasionally Capture One Express (sadly, that is going away).

In Photoshop, the first step is to process the RAW file using Adobe Camera RAW. That step converts a 2 dimensional array of coloured samples (each sample being an amount of a single colour) into a 2 dimensional array of coloured dots (with values for red/green/blue) - read up on Bayer Matrix if you need to understand that. One thing you will learn from reading up on Bayer Matrix processing is why there are extra samples around the edge of the mage - the Bayer de-mosaic process works best when it has samples all around each final pixel.

One of the key things to do first in processing a RAW file is to assign a white balance, consisting of a colour temperature with an offset - this is critical to getting accurate colours. If you assign a colour temperature that is too high everyone in the image will look like they are wearing dreadful fake sun-tan (very orange); if you assign a colour temperature that it too low everyone will look like they have come out of a freezer - hues of blue! RAW files usually contain a measured / estimated white balance, but you can include a grey card in one of your early images and set a proper white balance from that. Always get your white balance right from the outset.

With the white balance set, you then need to adjust the exposure, and set the black and white points. I read an entire book about using Adobe Camera RAW (Real World Adobe Camera RAW - I started with the version for Photoshop CS2 - Bruce Fraser and Jeff Schewe were great!) - that might give you an idea how much there is to this process. I bought and read three versions of this book - it was worth the money!

With modern Camera RAW I generally do most of my adjustments using the Black / Shadows / Highlights / White sliders once I have adjusted the Exposure (often raising exposure about 0.25 to 0.35 - I often think I should set my Ec to +0.3) - I rarely bother with a tone curve these days.

This tool also includes (on the Details page) the old and new De-noise processing - I never liked the old (it felt more like a Blur tool than anything else), but the new "AI" de-noise is competitive with DXO.

This is not how the JPEG engine in the camera works. I would not recommend modelling your adventures in processing RAW files upon the way the JPEG engine in the camera works.

There are a LOT of controls in Adobe Camera RAW, and you probably don't need to understand most of them :-D There are people who press the "Auto" button to get ACR to adjust the image for them.

I don't know if it's required these days, but I would suggest checking that you will be opening the image in Photoshop in "16 bit" rather than "8 bit" (a comment which brings back memories of long arguments about the "waste of space in 16 bit files"...)

Once you are ready, you press the Open button, and the processed RAW file opens in Photoshop, where I generally confine myself to cropping the image and remove spots and speckles and occasionally a photobomber :) Then I save the result as a JPEG.

I don't know if the above is helpful.
This sounds like the kind of white lab coat stuff we were writing about over twenty years ago when I was editor-in-chief of Digital Camera Magazine. You're telling me that there has been no change in either the toolkit or the mind-numbing complexity in two decades?
 
This sounds like the kind of white lab coat stuff we were writing about over twenty years ago when I was editor-in-chief of Digital Camera Magazine. You're telling me that there has been no change in either the toolkit or the mind-numbing complexity in two decades?
Sure there has, now you have to pay them monthly!
 
Sure there has, now you have to pay them monthly!
Oy! So true of so many things these days. Financialization killed innovation.
 
This sounds like the kind of white lab coat stuff we were writing about over twenty years ago when I was editor-in-chief of Digital Camera Magazine. You're telling me that there has been no change in either the toolkit or the mind-numbing complexity in two decades?
I don't know, but suspect that the principles and basics of digital photography itself have not changed. That's the way it was, that's the way it is.

The authors of FOSS processing software, unlike the commercial entities, are often keen on sharing the science and maths behind their creations. This can actually be off-putting to the likes of me: I pass out at the very mention of equatio.... ... ...

Pass the smelling salts. Ahhh... that's better...

I don't find darktable very difficult to use. Apart from adding the denoising module of your choice, and adjusting it to taste, all of the essentials of producing an image are done by default when you open it. (If you want to dip in, though, you can: it is done transparently. You will find that darktable has applied those modules. It remains only for you to adjust the image to look as you want it.

I begin with Lens correction, denoising and local contrast. Then exposure and colour calibration (to set the temperature). Then Tone equaliser followed by some tweaks in colour balance RGB. But it seems to be part of the thing that you might get your desired results in an entirely different way!
Now that makes some sense to what's left of my mind. :unsure: I will give it a go after a couple more :coffee:
 
I downloaded Darktable and when I tried to install it, the OS said it was damaged and to delete it, so I did. I'm told they drop a stable release on Christmas Day every year, so I will just wait.
 
I downloaded Darktable and when I tried to install it, the OS said it was damaged and to delete it, so I did. I'm told they drop a stable release on Christmas Day every year, so I will just wait.
Very odd, never had a problem and I've been downloading them for years. Which version?
 
The current one as of yesterday.
 

Attachments

  • version.jpeg
    version.jpeg
    28.6 KB · Views: 21
4.4.2 has been out for months. I have it on two PCs, no issues.
Irrelevant to me. No Windows allowed under my roof or on my network — zero.
 
That is why I started this thread about using two very prominent macOS photography applications.

Windows is dead to me.
 
Pretty sure it was developed for Mac first. It doesn't make sense. Did you try the download from their site?
 
Irrelevant to me. No Windows allowed under my roof or on my network — zero.
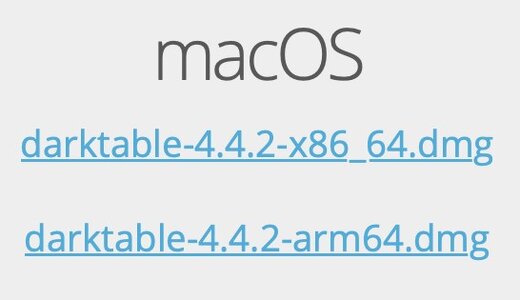
Looking at your screen shot, are you using an Intel-based Mac or an "Apple Silicon" Mac? I wonder if that "damaged" report you saw was due to trying to use the version that doesn't match your hardware?
 
Looking at your screen shot, are you using an Intel-based Mac or an "Apple Silicon" Mac? I wonder if that "damaged" report you saw was due to trying to use the version that doesn't match your hardware?
Possible. No worries, I’ll wait until Christmas and try again.
 
No, you don't have to wait until Christmas. I don't know that that is true anyway. You do have to download only from darktable's own sources. And make sure it is the right one for your OS/hardware.

There's always the latest stable version available, along with development and other versions if you want to play that game, which I don't, and probably you don't either.

Mine's Linux
 
Possible. No worries, I’ll wait until Christmas and try again.

Ah, the long list of things that are waiting for the Christmas break! I doubt I will reach the bottom of my list...
 
No, you don't have to wait until Christmas. I don't know that that is true anyway. You do have to download only from darktable's own sources. And make sure it is the right one for your OS/hardware.

There's always the latest stable version available, along with development and other versions if you want to play that game, which I don't, and probably you don't either.

Mine's Linux

I do enough debugging of other people's software in my day job. I'm happy to use the stable versions of software for my photography :)
 
So I contacted the folks who make Pixelmator and Photomator about some tutorials for learning to use their products to work with Raw photos and got a helpful reply:

"I believe Take Better Photos's channel is right up your alley!

They have a video on this topic exactly, and overall the content there is great and we're very proud that a community member can produce such high quality material to share. - https://www.youtube.com/watch?v=mbbzKcPRMnI
"


I just took a cursory look at the videos and it looks good!
 
Back
Top